
Ep 005: Label the Quilts, People!
SPOTIFY | APPLE | YOUTUBE
Hey, patchwork friends!
This week on the podcast, I’m sharing some heartfelt thoughts and practical tips on labeling quilts. Whether you're a seasoned quilter or just starting your quilting journey, this episode will help you understand the importance of labeling and documenting your quilts, and recognize that there is nobody who will ever be able to document your art the way you can!
Documenting our work matters:
Every quilt holds a piece of history and a quilter’s heart. Documenting your quilts is a way to ensure their stories are preserved for generations to come. Imagine discovering a beautifully crafted quilt in a family member's closet but having no clue about its origins. When was this beautiful quilt made? WHY was it made? Was there something special about it? Documenting the details of your quilt will provide future generations with a deeper connection to this piece of art.
Ideas for how to make quilt labels include:
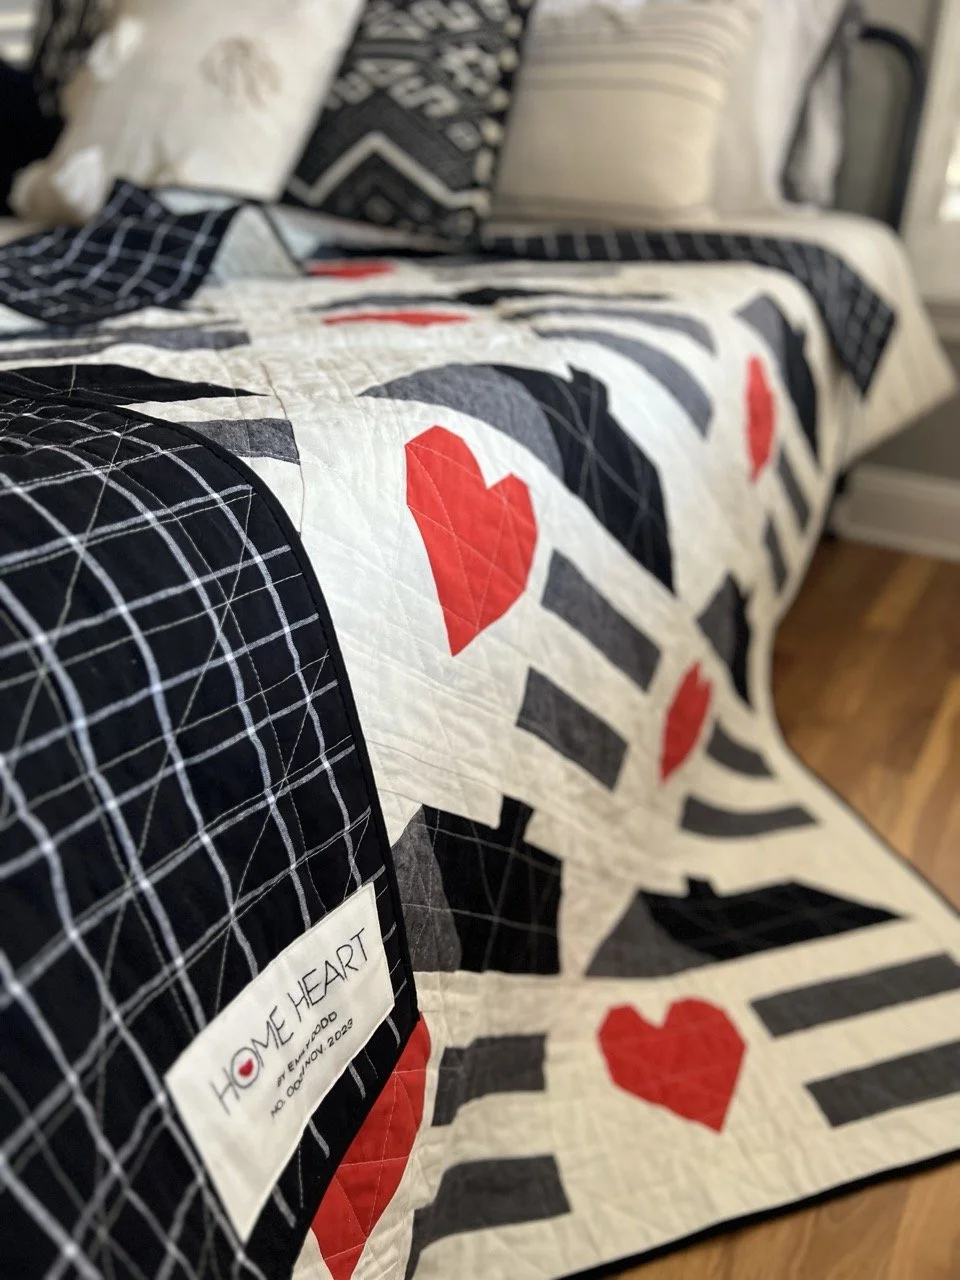
A handwritten label: is simple and quick to make using a marker with archival ink. Be sure to heat set the label with a hot iron to make the marker colorfast. Handwriting adds a personal touch that is sure to be cherished by a loved one.
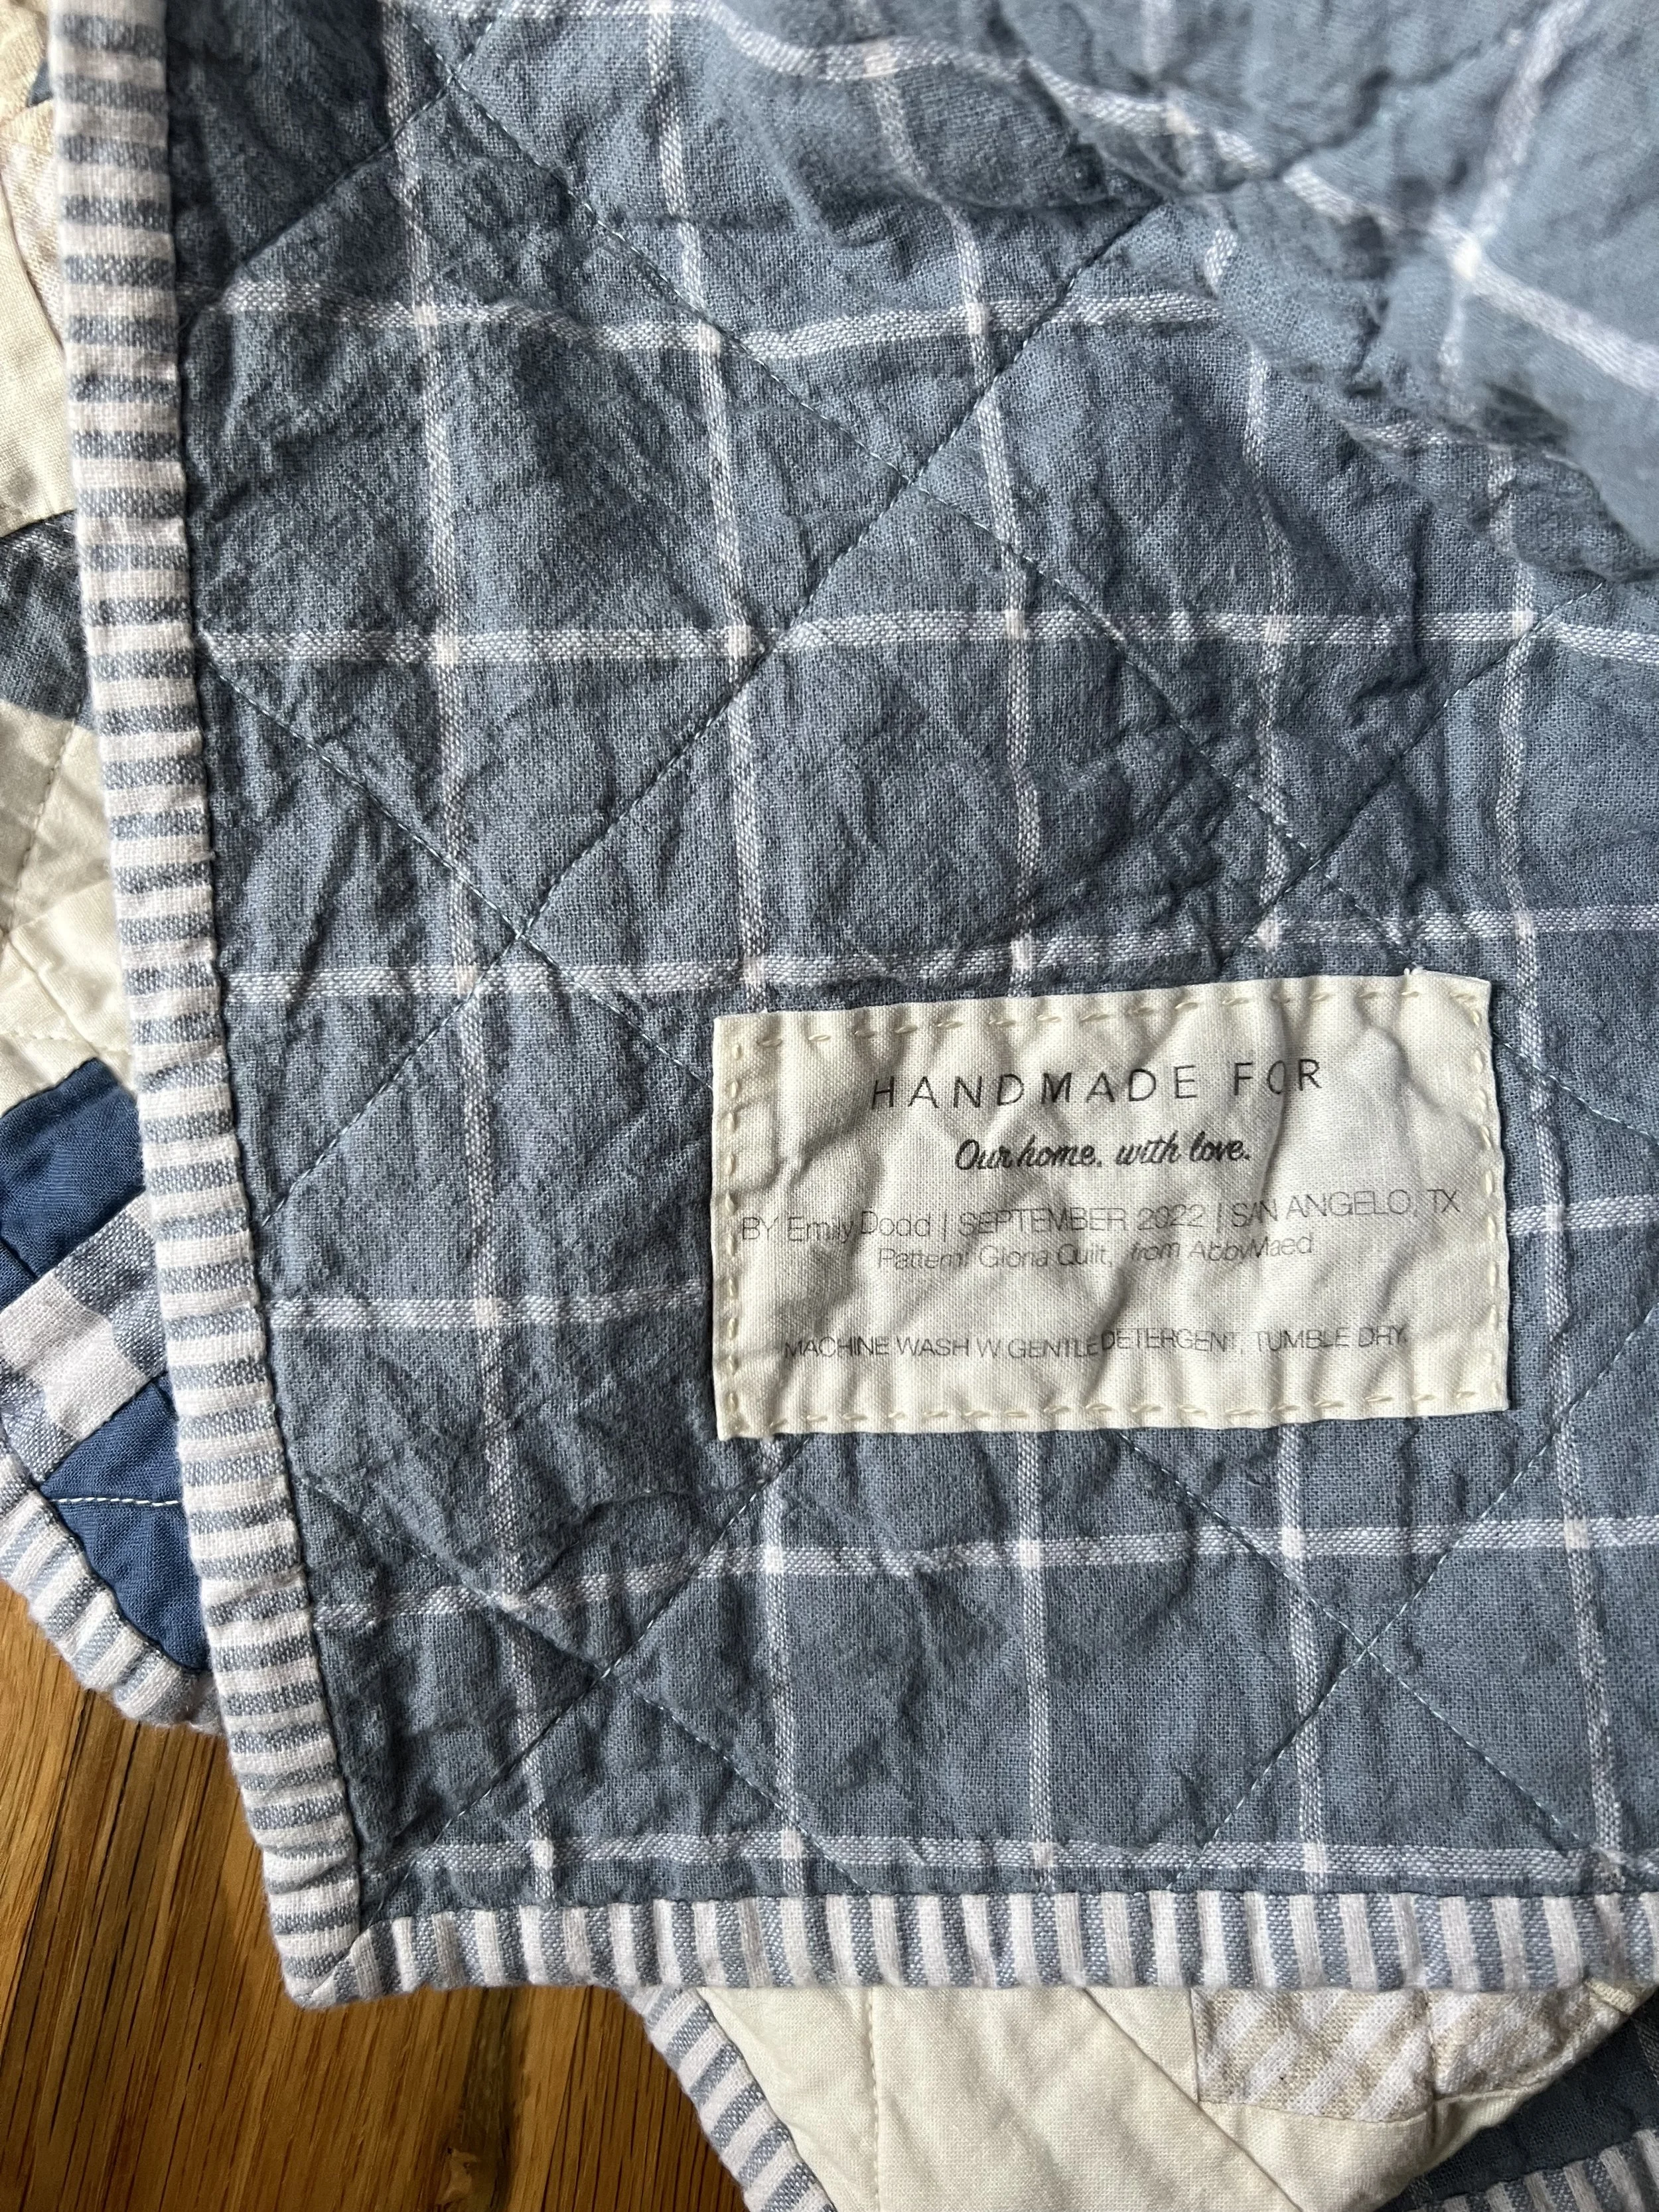
A printed label: quick and easy, and allows for the inclusion of all the detail you could imagine. Colorfast inkjet printer fabric sheets are available and make this technique a breeze!
*Note: this is an affiliate link - anything you purchase using this link will generate a small commission for me to use to support the podcast. The final price of the item will not be affected. Thank you for your support!Machine embroidered label: can be created using an embroidery machine, or possibly even specialty decorative letter stitches if available on your machine. These could be affixed to the quilt once it is completed, or could even be embroidered directly into the patchwork!
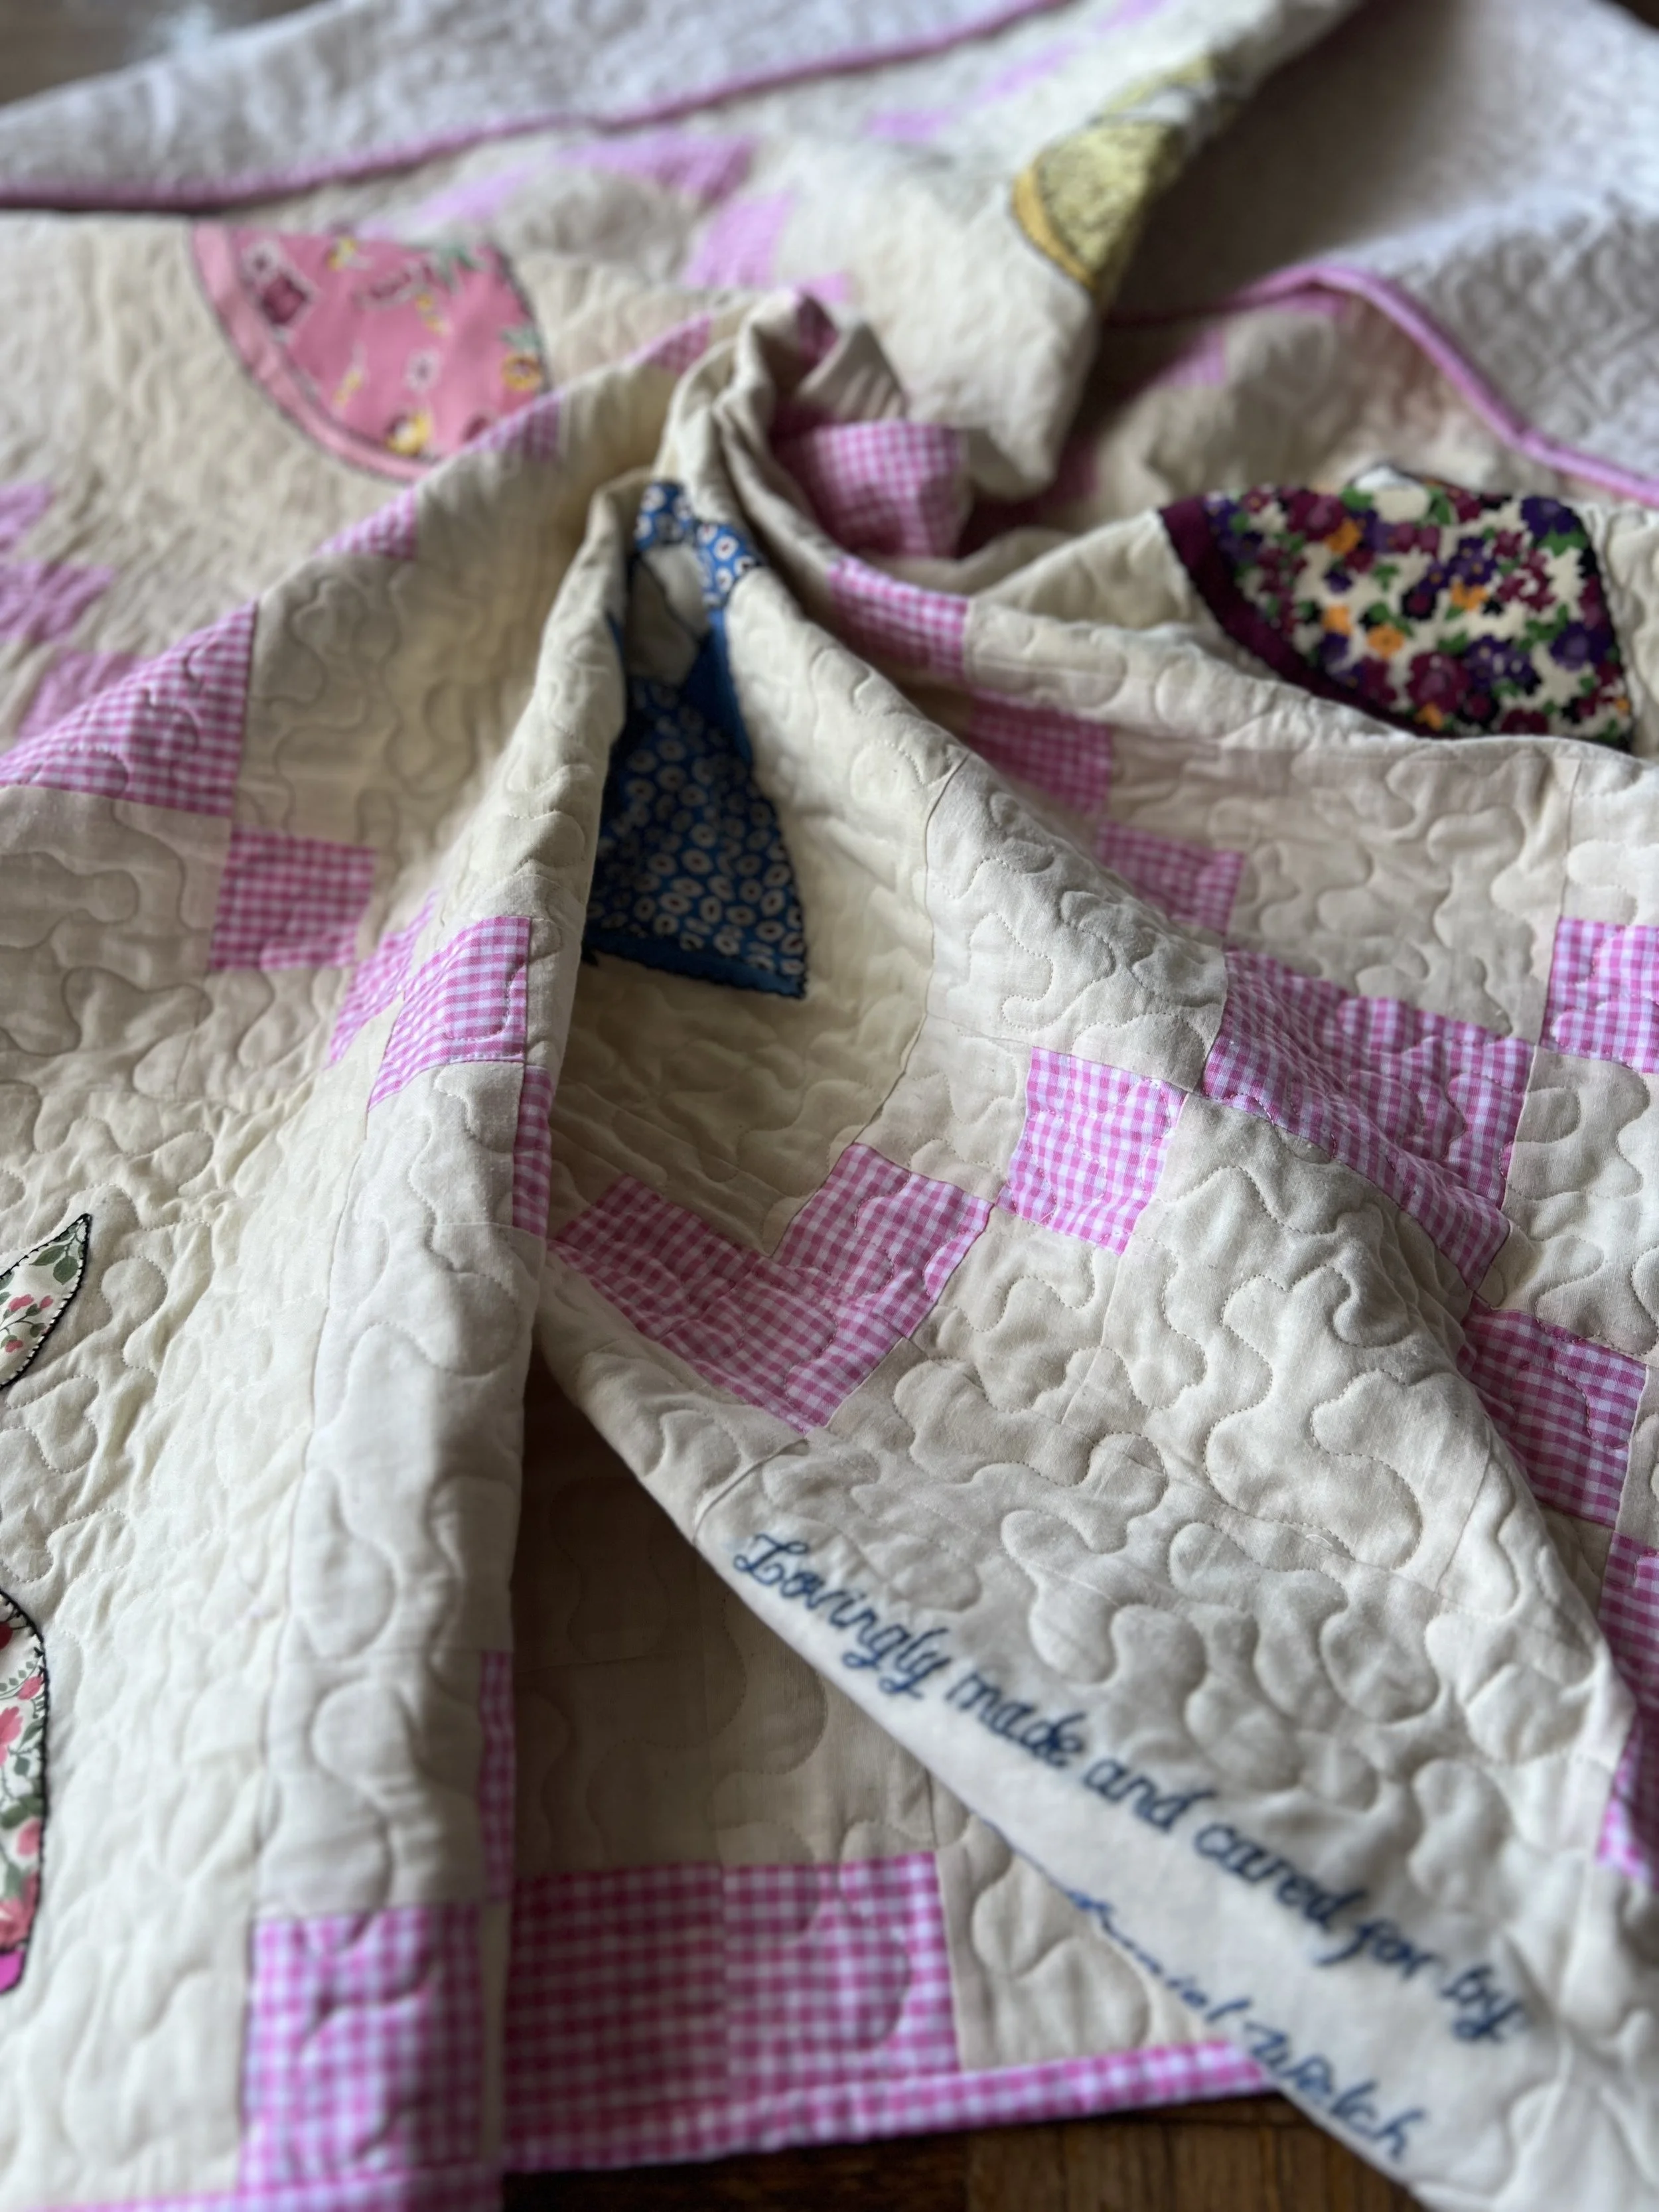
Hand embroidered label: while more time-consuming than previously mentioned techniques, this can add a special touch to special quilts, such as the cover quilt for a quilt pattern, or an original design. Information tends to be more sparse and basic, such as pattern name, your name, and the date/location.
Here’s an idea - why not combine a few of the techniques mentioned above! Maybe a hand-embroidered detail feels lovely to include, and could be added to with some handwritten information to add to the details included about your quilt. This is YOUR label for YOUR quilt, get creative and have fun!
What to include in a quilt label:
When it comes to labeling, more is often better. Here’s a list of suggested details to include:
Names (yours and possibly the recipient)
Dates (start and finish dates)
Location (city and state, or country if more appropriate)
Pattern name and designer, if not original
Name of the quilter, if not you
Occasion (if it’s a gift)
Any special quotes or messages
Including care instructions can also be helpful, making recipients feel welcome and even encouraged to actually use and enjoy their quilt!
To get your creative juices flowing, I created a customizable quilt label template in Canva that you can access here!
Attaching the quilt label
This can be as simple as hand stitching a label onto the back of a quilt, or stitching it into the corners of your binding. Here are a few techniques for attaching labels that I personally use regularly:
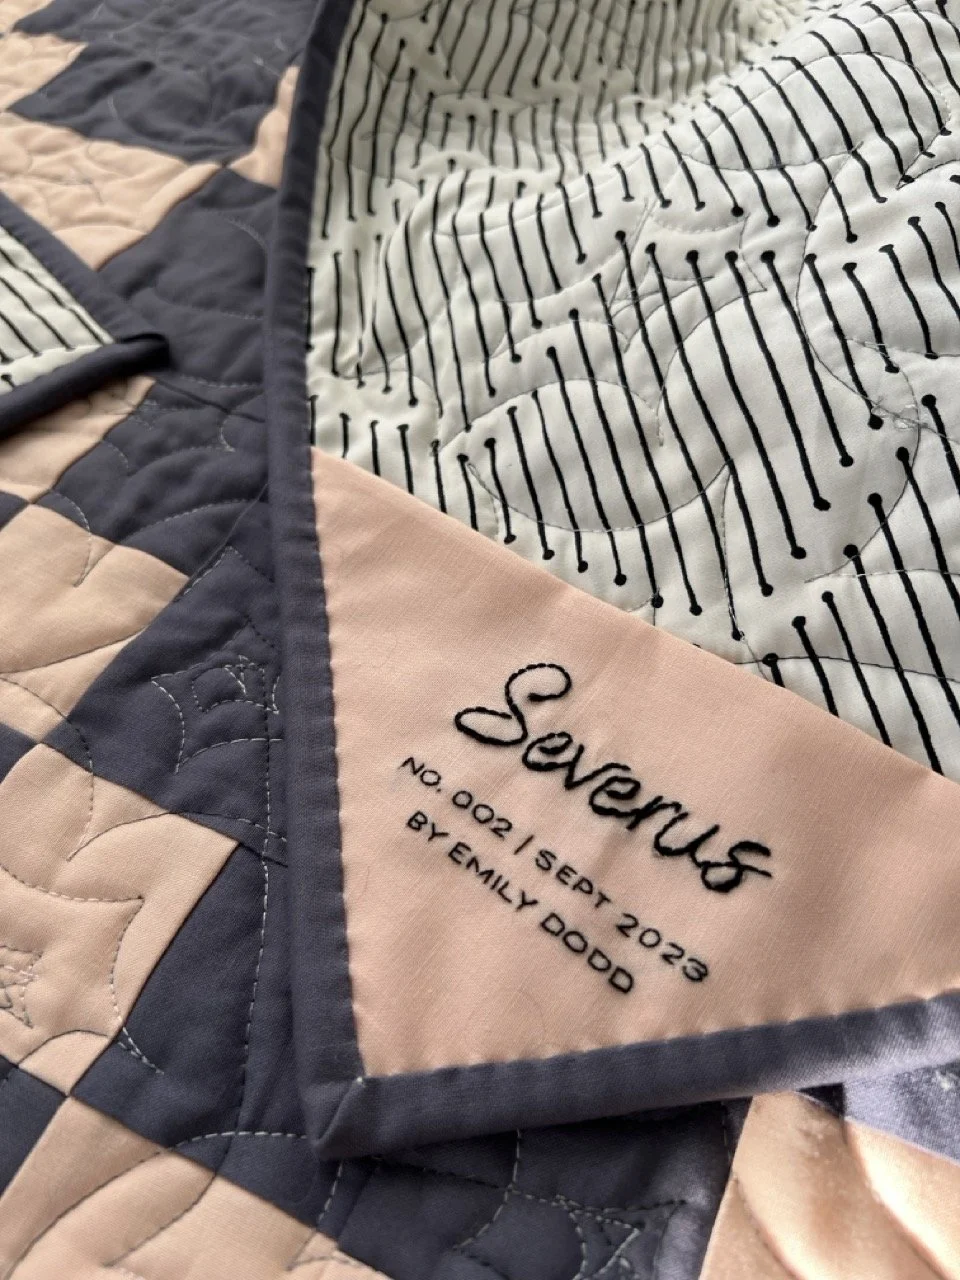
Triangle label: fold your printed label into a triangle and sew the raw edges into a corner of the quilt as your are attaching the binding. This will be less conspicuous from the front of the quilt.
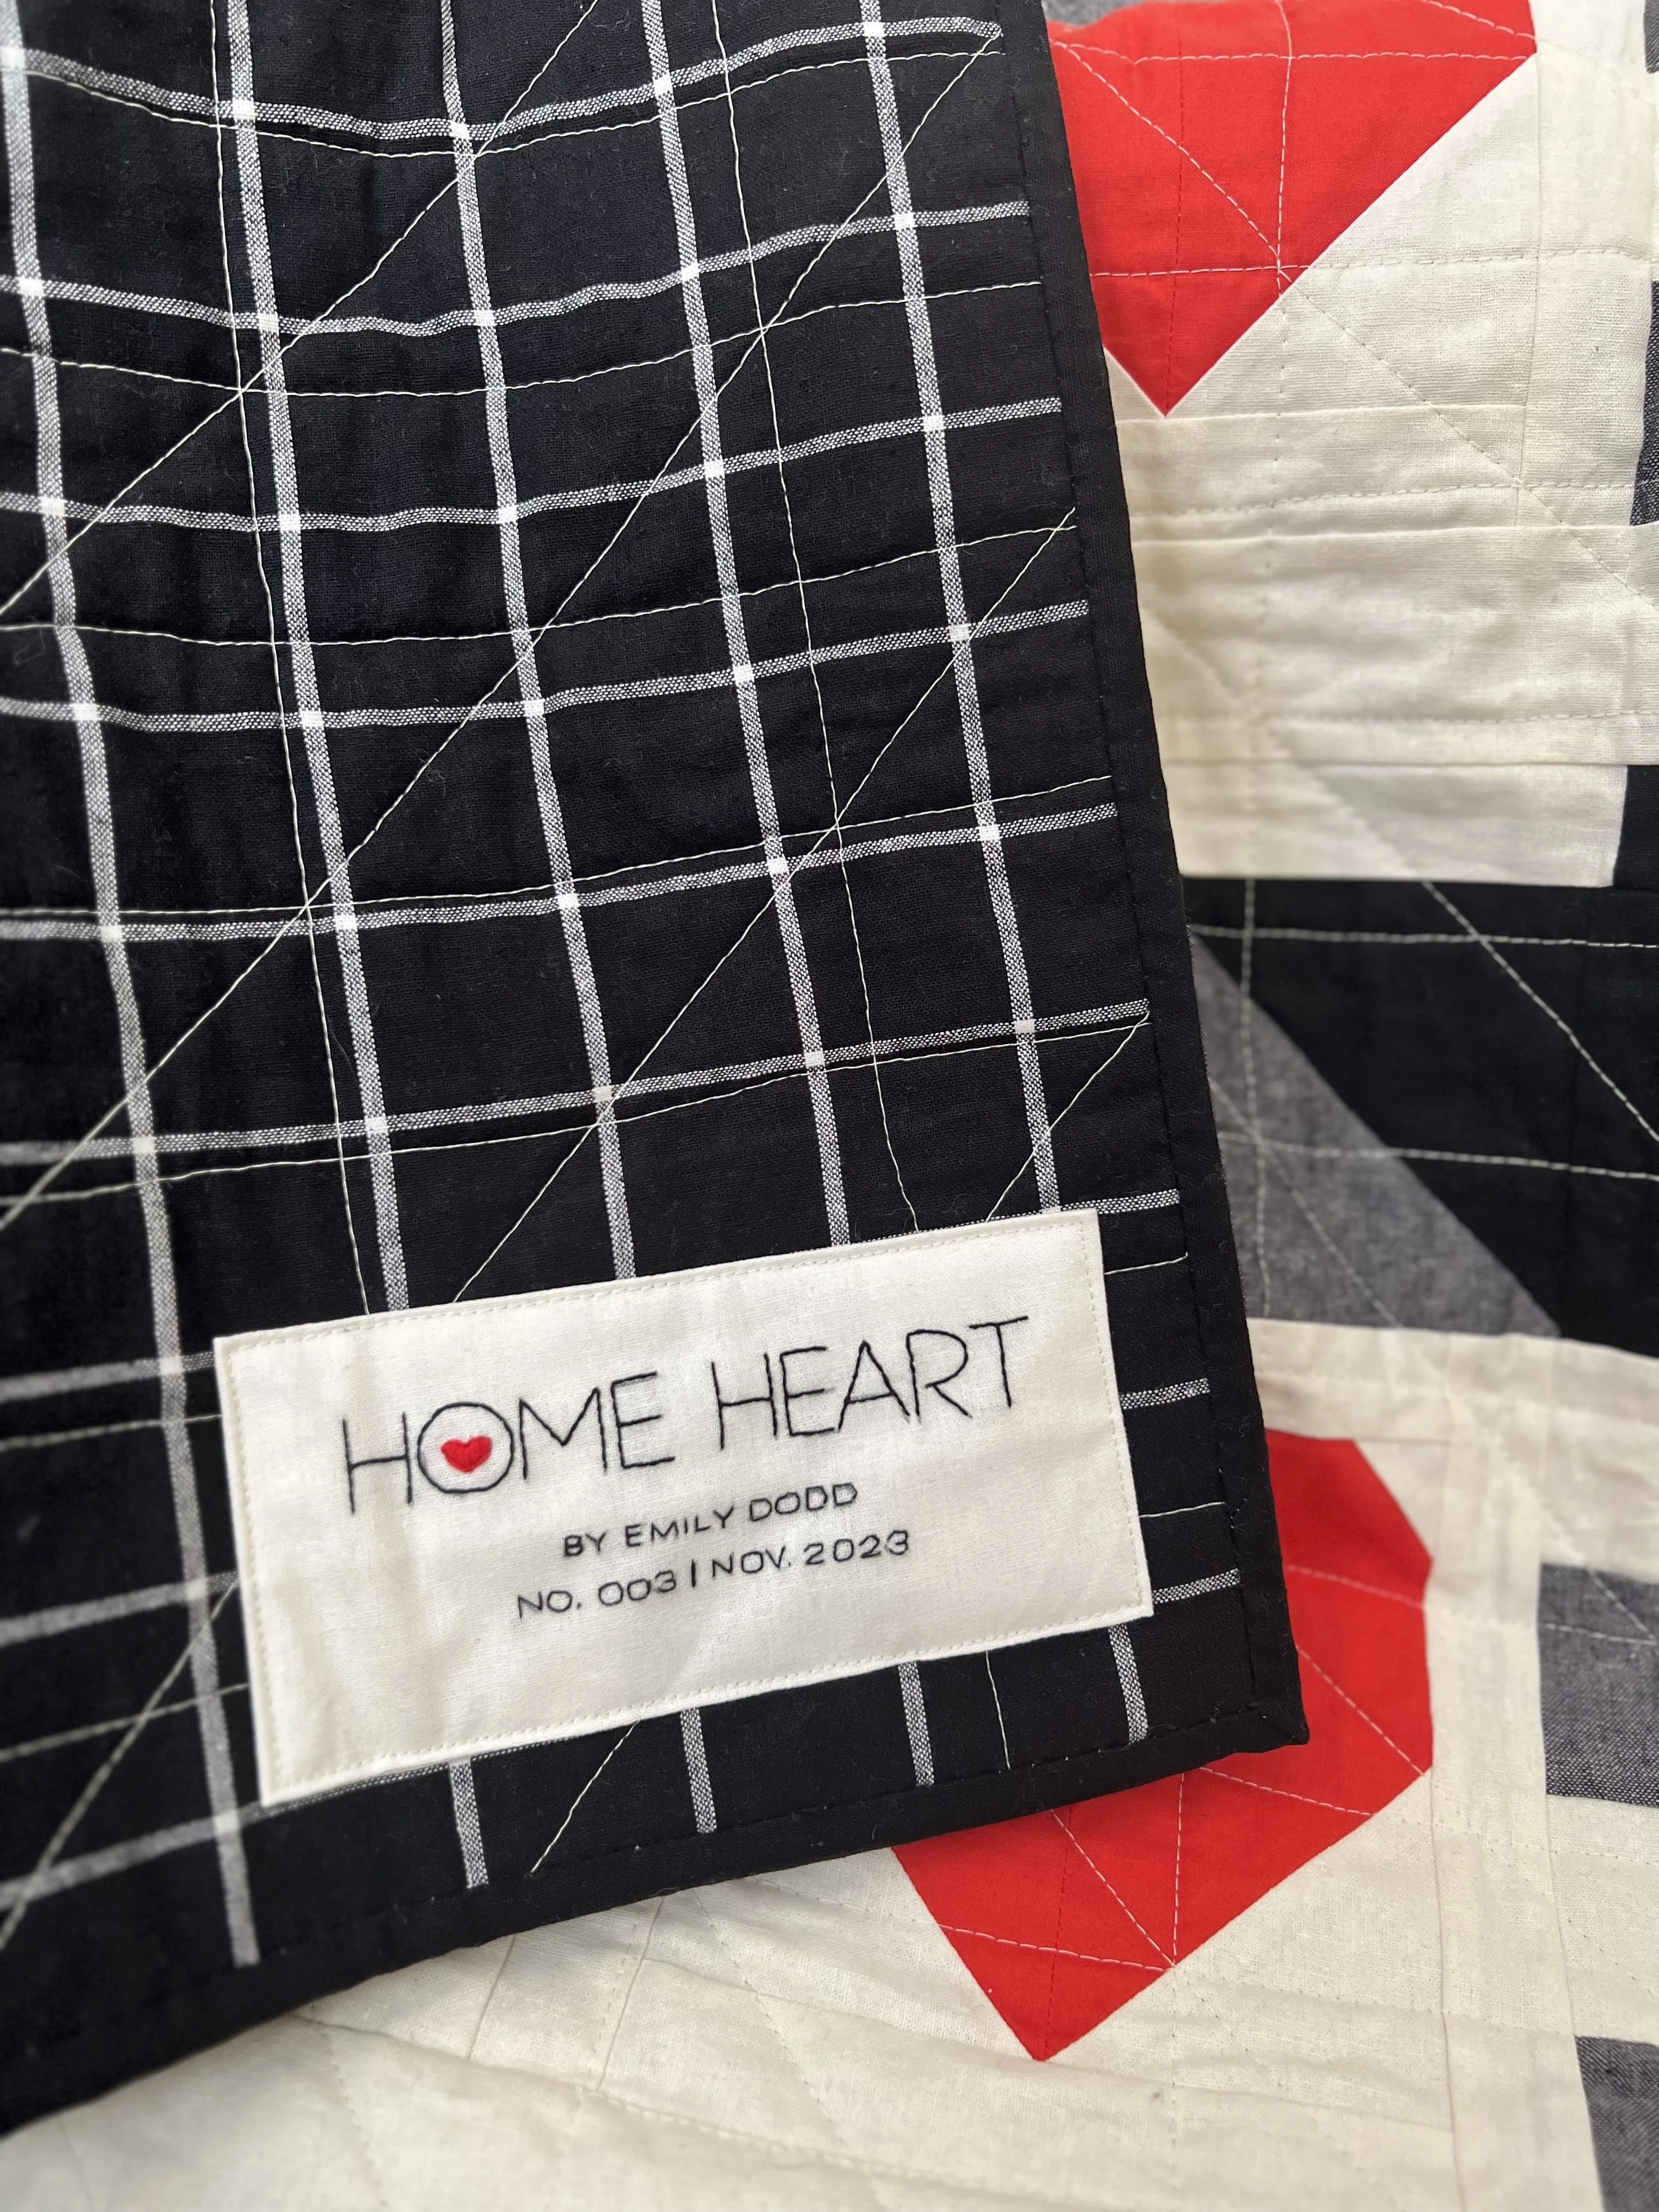
Patch Label: trim your label with a half-inch seam allowance, and fold the seam allowance to the back (wrong side) of the label. You can hand stitch this down between the layers of the quilt sandwich so that your stitches are visible only on the back of the quilt, OR you can use your machine to attach the label through all three layers of the quilt sandwich. While this will be visible from the front of the quilt, it tends to be less noticeable than you’d imagine when intentionally placed in a less prominent area of the quilt.
Some quilters have suggested piecing your label (or perhaps embroidering the label) directly into the quilt backing. In this case, you’d need to ensure that you place the labeled area well within the area of the finished quilt, not in the backing overage.
Let’s take it a step farther, folks!
Here are a few ideas for those of you who are ready to take your quilt documentation to the next level!
Dedicate a few moments to pre-making your quilt label during the cutting step of your next project. This will make it feel more integrated into the process of making a quilt, rather than just as an afterthought once a quilt is complete.
Consider making labels for ongoing projects or WIPs. This helps future generations understand your intentions for unfinished works guide them in the process of preserving your legacy.
Start a quilt journal! I was inspired by my Mama’s quilt journal, and looking through her work has prompted me to start my own quilt journal to document my quilts over the years! If you feel inspired, you can download a printable PDF journal page template and start a quilt journal of your very own!
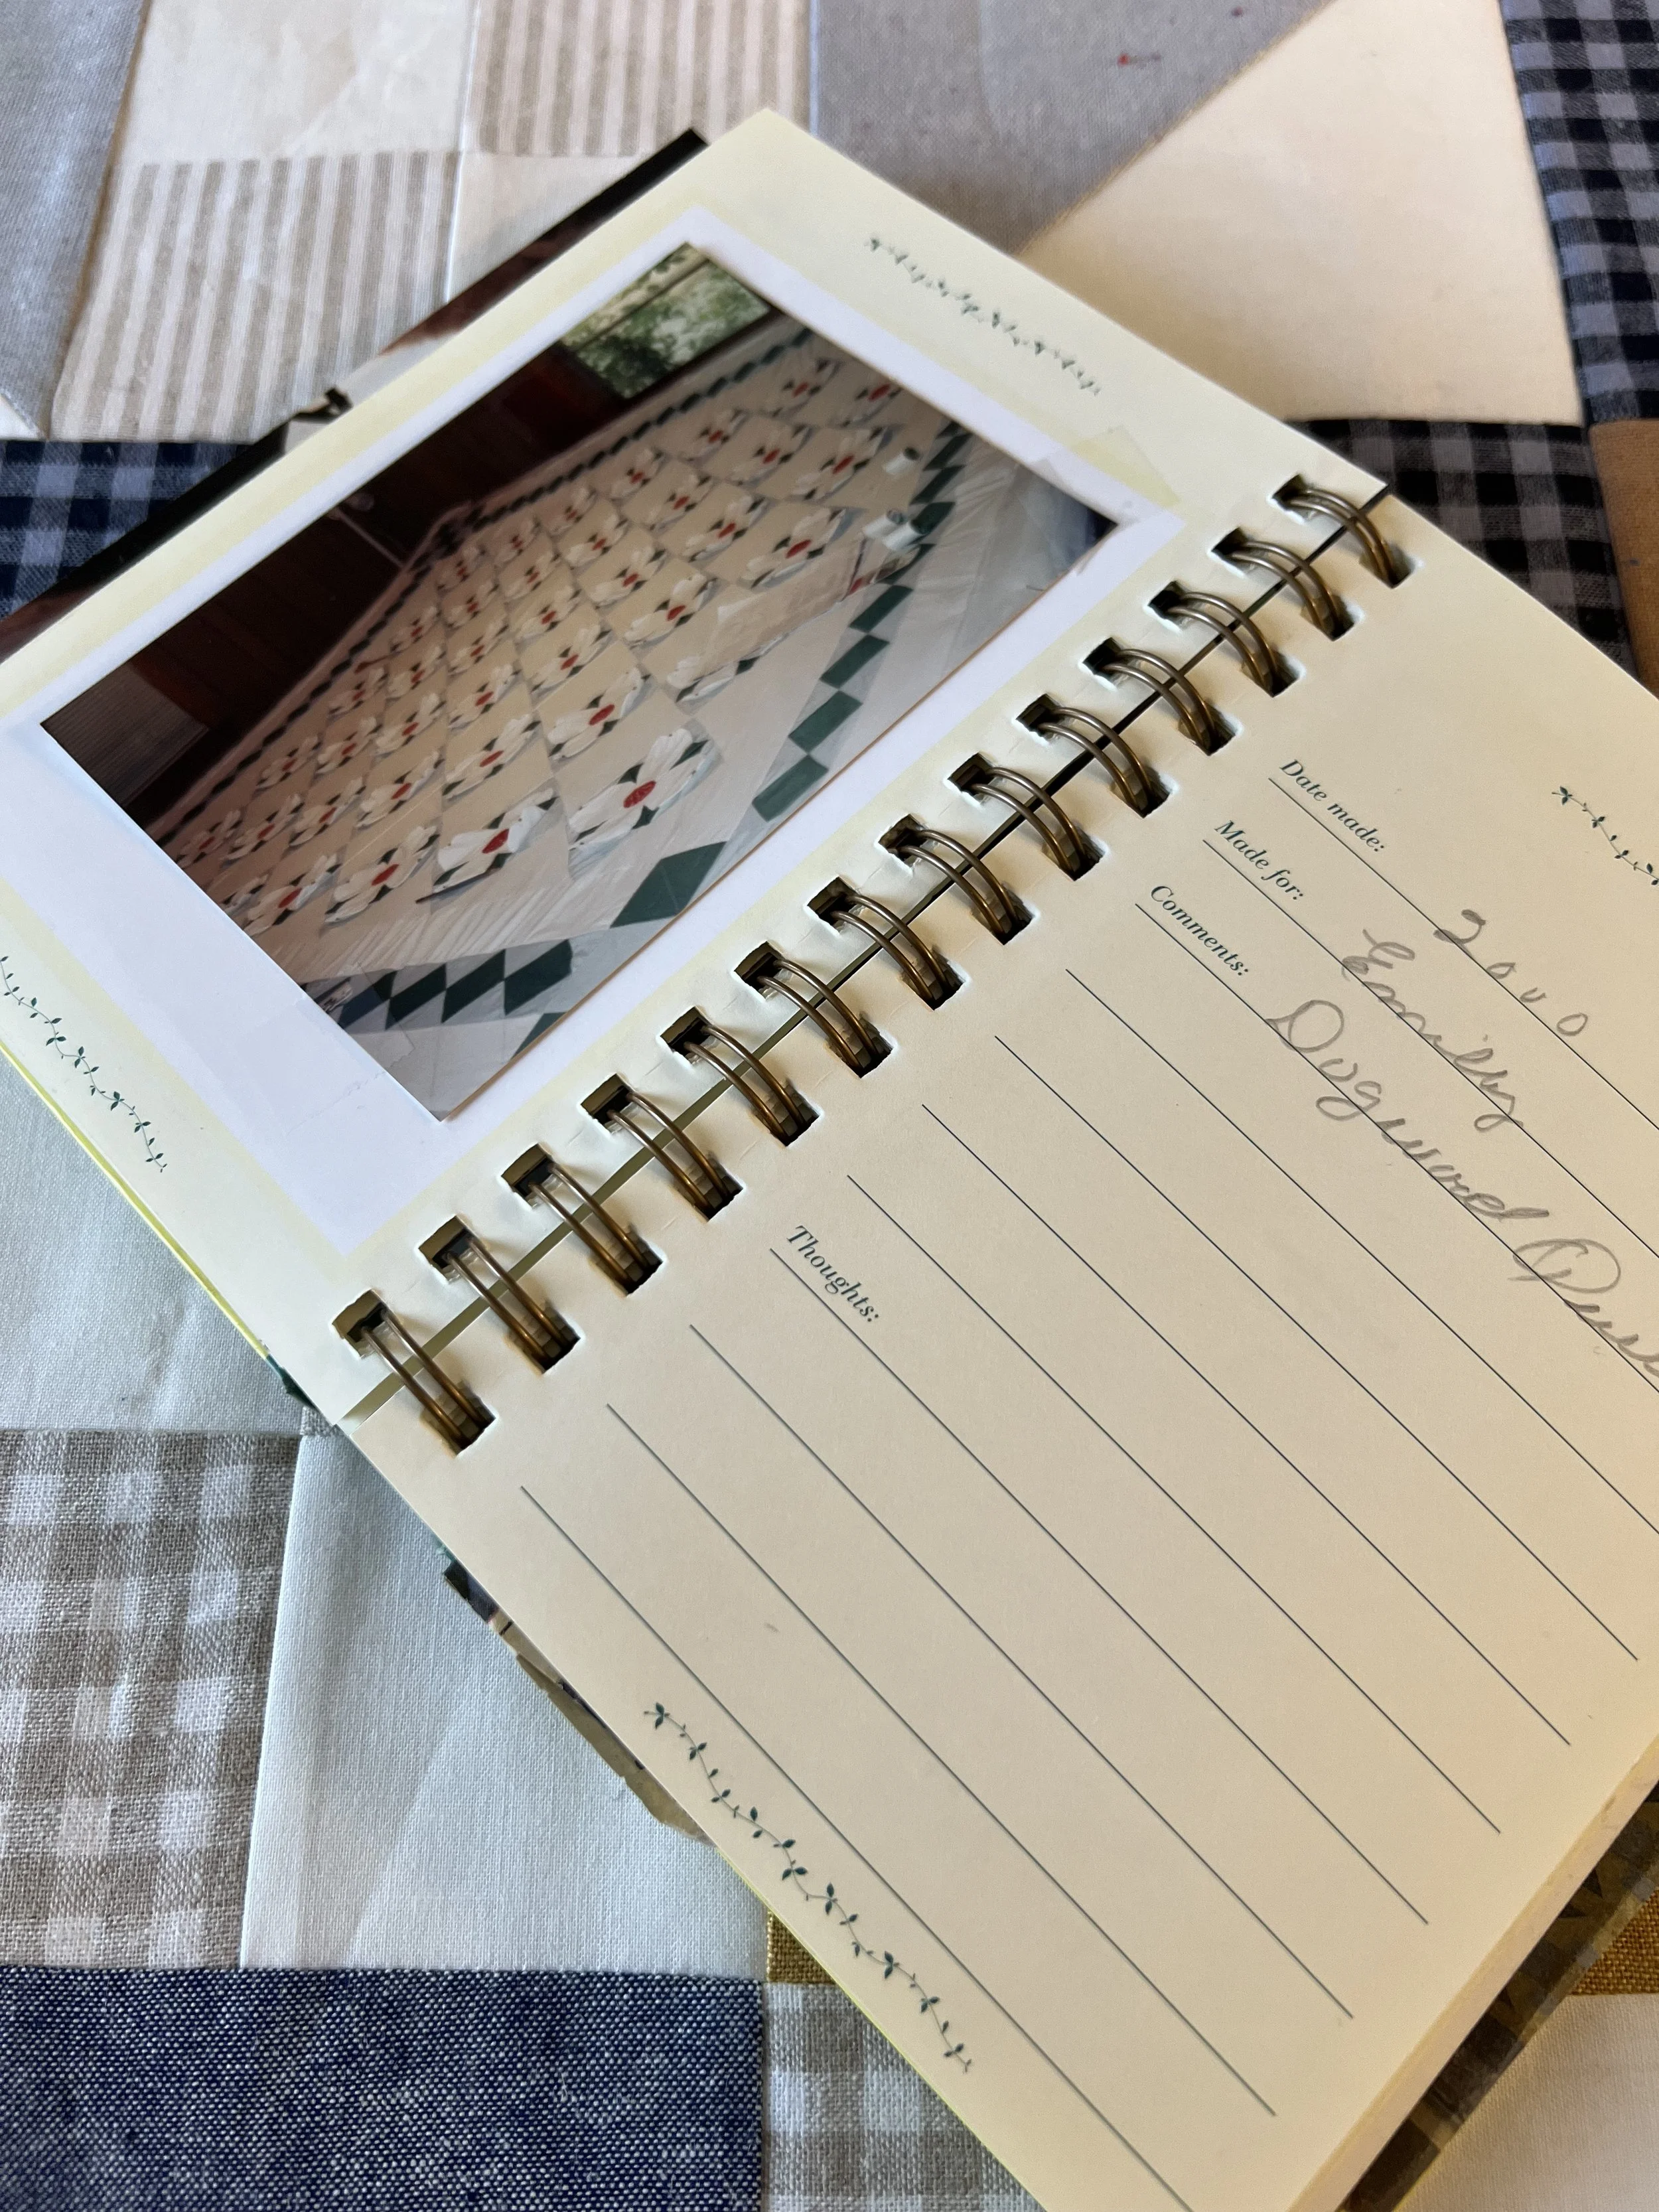
A page from my Mama’s quilt journal, which is now a most treasured part of my sewing room library.
Quilt labels serve more than a practical purpose; they're a tribute to your artistry. By taking the time to document and label, you are acknowledging your quilts' rightful place in history.
I hope you feel inspired to start or continue documenting your quilts. For templates and further ideas, check out the quilt label template and the quilt journal page template that are available for delivery straight to your email for free. Until next time, keep preserving the history of your beautiful quilts, and remember, Patchwork Revival is here to celebrate the generational connection we find in quilting.
